

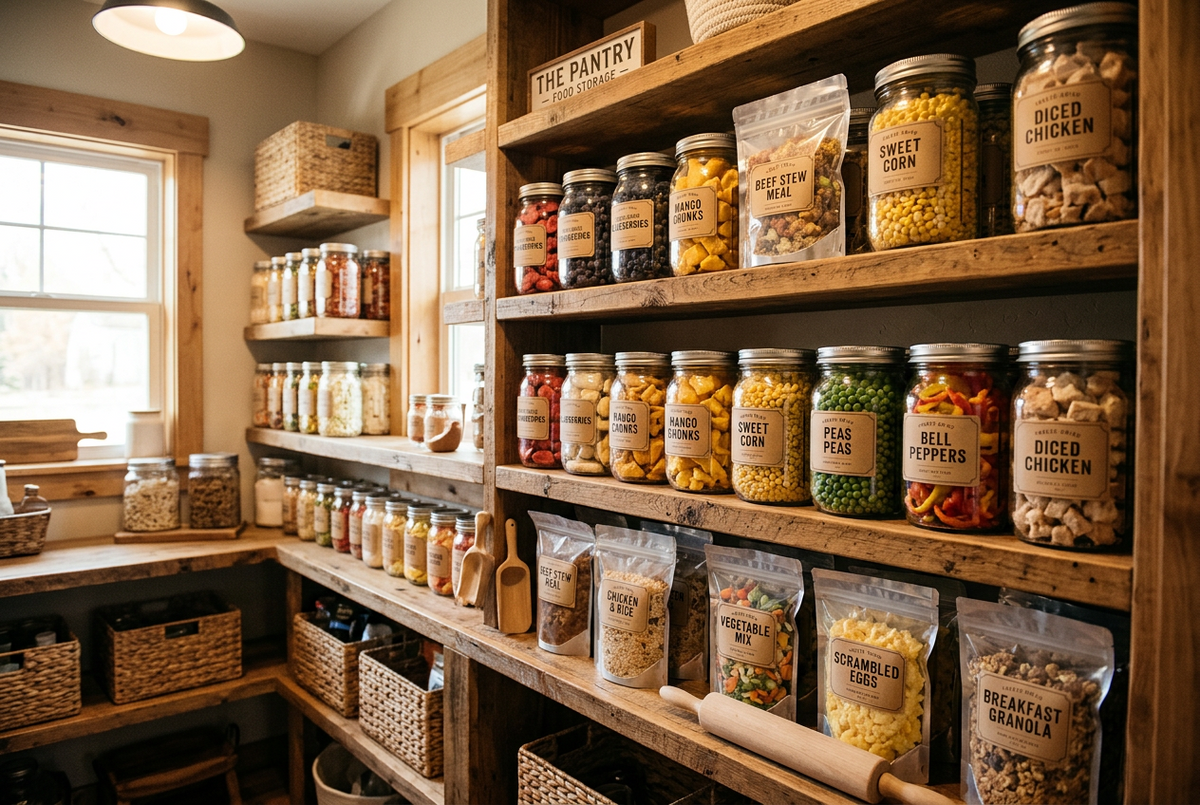
A freeze-dried food pantry is a shelf of properly dried and packaged foods your household actually uses, from fruit for breakfast to vegetables and ingredients for soup. To build one, start with foods you already eat, plan them around real meals, package and label them well, store them somewhere cool, dry, and dark, and use and rotate them regularly.
Imagine opening your pantry and finding strawberries for breakfast, vegetables for dinner, ingredients for your favorite soup, and a few meals you prepared months ago. That's one of the practical advantages of home freeze drying: you can preserve many of the foods your household already eats without taking up refrigerator or freezer space.
[ADD: a photo of a real, organized Harvest Right pantry shelf.]
This guide covers the everyday household version. If you're planning for emergencies, see the links in Step 1.
What Is a Freeze-Dried Food Pantry?
It's a collection of properly processed and packaged freeze-dried foods stored for later use. It might include:
-
Fruits for snacks and breakfasts
-
Vegetables for cooking
-
Cooked meats for meals
-
Rice, beans, and other prepared ingredients
-
Complete meals
-
Herbs and seasonings
-
Baking ingredients
-
Foods for camping and travel
Unlike frozen foods, properly freeze-dried and packaged shelf-stable foods generally don't need to stay refrigerated or frozen. A pantry doesn't have to be big to be useful: even a single shelf of foods you use regularly can make cooking easier.
Start With the Foods Your Household Already Eats
Before you freeze dry dozens of things, look at your normal grocery list:
-
What do you buy most often?
-
Which ingredients do you use every week?
-
What spoils before you finish it?
-
Which meals does your family enjoy?
Those answers are a better starting point than trying to store as much as possible. A household that makes soup often might want carrots, peas, corn, cooked chicken, and herbs. A smoothie-loving family might start with strawberries, blueberries, and bananas. Someone who backpacks might focus on lightweight ingredients and prepared meals. Build around real eating habits, not just the foods that are easiest to preserve.
Step 1: Decide What You Want Your Pantry to Do
You may have more than one goal. Knowing which matters most helps you choose foods.
-
Everyday cooking: Keep vegetables for soups, fruit for oatmeal, or herbs for sauces when fresh ingredients aren't on hand.
-
Reducing food waste: Freeze dry appropriate foods before they spoil, such as surplus produce, seasonal fruit, and safely handled leftovers.
-
Seasonal preservation: If you grow or buy produce in season, freeze drying is another way to keep part of the harvest. See how to freeze dry your garden harvest.
-
Camping and travel: Lightweight meals and ingredients help when carrying weight matters.
-
Emergency preparedness: A pantry can complement other emergency supplies. Freeze-dried food usually needs water to rehydrate, so emergency planning should also include safe drinking water and foods that can be eaten without preparation. For planning help, see building an emergency food plan and organizing a prepper's pantry.

Step 2: Organize Your Pantry Into Food Categories
Grouping foods by how you use them makes the pantry easier to maintain.
|
Category |
Examples |
Common uses |
|
Fruits |
Strawberries, apples, bananas, blueberries |
Snacks, cereal, baking |
|
Vegetables |
Corn, peas, carrots, green beans |
Soups, side dishes, casseroles |
|
Proteins |
Properly cooked chicken, lean beef, beans |
Meal preparation |
|
Grains and starches |
Cooked rice, pasta, potatoes |
Quick meals and side dishes |
|
Complete meals |
Soups, stews, prepared dishes |
Convenient meal options |
|
Cooking ingredients |
Herbs, onions, peppers, tomato products |
Recipes and seasonings |
|
Snacks |
Fruit pieces, yogurt drops, selected desserts |
Everyday snacking |
You don't need every category right away. Start with the two or three that matter most to your household.
Step 3: Plan Meals Before You Plan Quantities
A common mistake is collecting ingredients without thinking about how they'll become meals. Choose a few familiar recipes and work backward.
-
Chicken and vegetable soup: properly cooked chicken, carrots, peas, corn, onions, herbs, and the other shelf-stable ingredients your recipe uses. For ready-made ideas, see freeze-dried soup kits.
-
Breakfast oatmeal: oats, freeze-dried strawberries and bananas, cinnamon.
-
Rice and vegetables: cooked freeze-dried rice, peas, carrots, corn, seasonings, and a protein you've prepared safely.
When you plan around meals, your pantry becomes a practical cooking resource instead of a pile of preserved food.
Step 4: Estimate How Much Food You Need
You don't need to begin with a year's worth. Start with a manageable goal, such as ingredients for several meals or a snack your household eats often.
Number of meals × servings per meal = total servings needed. For six dinners serving four people, that's 6 × 4 = 24 servings. Then work out the amount of each ingredient your recipes need. If one dinner uses two cups of prepared vegetables for four servings, six of those dinners need twelve cups.
Dry volume and weight differ from rehydrated volume and weight, so record how much food you start with, how much it weighs after drying, and how much water you add when rehydrating. Those notes make future estimates more accurate. See how to rehydrate freeze-dried food.
Good first pantry goals include a week of selected meal ingredients, several favorite family recipes, a month of one snack, a collection of seasonal produce, or a few camping meals. Expand once you know what your household actually uses.
Step 5: Package, Label, and Store It Well
The details of packaging and storage have their own guides, so here's the short version.
Packaging. Freeze-dried food readily absorbs moisture from the air, so package it promptly once it's completely dry. Airtight jars suit foods you use often, such as fruit for cereal, apples for snacks, vegetables, and herbs. For longer-term storage, appropriately selected Mylar bags with oxygen absorbers are commonly used. Proper sealing matters, and packaging can't make up for food that wasn't fully dry. See how to package freeze-dried food for long-term storage, how to store freeze-dried food, and what Mylar is and why it's used.
Labeling. At minimum, write the food name and packaging date. Also consider quantity or servings, ingredients, allergens, rehydration instructions, and a batch or recipe name. Mark anything that needs cooking, such as raw meat or eggs, so it's handled and cooked like any raw ingredient. A sample label:
Chicken Vegetable Soup Freeze dried: MM/YYYY Servings: 4 Ingredients: cooked chicken, carrots, peas, corn, onion, thyme Rehydrate: add hot water and let stand until tender (use your tested amount) Fully cooked before drying
[ADD: a printable label template readers can download.]
Storage conditions. Choose a cool, dry, dark spot protected from heat, moisture, sunlight, pests, physical damage, and big temperature swings. A cool pantry or interior closet often works. Don't assume an attic, hot garage, or damp basement is suitable. Keep packages off the floor and check the area from time to time.
Shelf life. Properly freeze-dried and packaged food can last much longer than refrigerated or frozen food, and under favorable conditions some foods may approach 25 years. That's not a guarantee for every food. Fat content, how dry the food was, packaging quality, temperature, light, and seal integrity all matter, and higher-fat foods call for more conservative expectations. Once you open a package, reseal it promptly and protect it from moisture.

Step 6: Organize for Easy Access
Use first in, first out (FIFO): put newly packaged food behind older packages of the same item and use the older ones first. You can also organize shelves by category, for example:
-
Shelf 1: fruits and snacks
-
Shelf 2: vegetables and cooking ingredients
-
Shelf 3: proteins and prepared meal ingredients
-
Shelf 4: complete meals and longer-term storage
Your system just needs to make sense for your household.
Step 7: Keep a Simple Inventory
As your pantry grows, a notebook or spreadsheet helps you know what you have. Update it when you add or use food, and note which foods your family likes most so you preserve more of what gets eaten.
|
Food |
Quantity |
Packaged |
Location |
|
Strawberries |
4 jars |
MM/YYYY |
Pantry shelf 1 |
|
Corn |
6 bags |
MM/YYYY |
Storage bin A |
|
Cooked chicken |
3 bags |
MM/YYYY |
Storage bin B |
|
Vegetable soup |
4 packages |
MM/YYYY |
Pantry shelf 3 |
[ADD: a downloadable inventory spreadsheet template.]
Step 8: Use Your Pantry Regularly
A pantry shouldn't become food you never touch. Using it regularly helps you learn which foods rehydrate well, improve your recipes, find favorite snacks, rotate older packages, check packaging quality, and avoid waste. Try freeze-dried vegetables in soup, fruit in oatmeal, or herbs in a favorite recipe. When the pantry is part of everyday cooking, it's easier to maintain.
A Simple Four-Week Pantry-Building Plan
-
Week 1: Choose your foods. List ten foods your household uses regularly, pick two or three suited to freeze drying, and decide how you'll use them.
-
Week 2: Preserve your first ingredients. Freeze dry a manageable batch, check for complete dryness, package it, and label everything.
-
Week 3: Test meals and rehydration. Use some of it in familiar recipes and record the water and time needed. Adjust future portions.
-
Week 4: Organize and plan the next batch. Start your inventory, review which foods were most useful, and choose the next batch based on real needs.
After four weeks you'll have the start of a practical pantry and a clearer idea of how to grow it.
How Much Freeze-Dried Food Should a Family Store?
There's no single right amount. It depends on household size, eating habits, storage space, budget, dietary restrictions, and whether the food is for everyday meals, travel, or emergencies. For everyday convenience, start with foods you already use. For emergencies, plan complete meals, adequate calories, nutrition, safe water, and preparation supplies, not just a number of bags. Freeze-dried food is one part of a well-rounded food supply. See creating a winter emergency food storage plan for an example of planning ahead, and what size freeze dryer do I need? if you're sizing a machine to your goals.
Common Pantry-Building Mistakes
-
Storing foods nobody eats. Just because a food can be freeze dried doesn't mean it belongs in your pantry.
-
Packaging everything in large bags. Use portions that match how you'll use the food.
-
Forgetting rehydration instructions. Test complete meals and record the results.
-
Assuming every food has the same shelf life. It varies with the food, packaging, and conditions.
-
Ignoring water needs. Many freeze-dried foods need water before eating, which matters most for travel and emergencies.
-
Never rotating. Using and replacing food keeps it fresh and keeps older packages from being forgotten.
Frequently Asked Questions
What foods should I put in a freeze-dried pantry?
Start with foods you regularly eat, such as fruits, vegetables, properly cooked proteins, and meal ingredients, choosing ones that freeze dry well and fit your recipes.
How do I start a freeze-dried food pantry?
Begin with a small selection of foods, freeze dry and package them properly, label every container, and store them in a cool, dry, dark place. Expand based on what your household uses.
Do I need special shelves?
Not necessarily. Sturdy shelves in a suitable spot work well, as long as packages are protected from heat, moisture, sunlight, pests, and damage.
Should I store complete meals or individual ingredients?
Both have a place. Ingredients are flexible for cooking, while complete meals are convenient. The right mix depends on how you plan to use the pantry.
How do I know how much water to add when rehydrating?
It depends on the food and how it was prepared. Test a small portion, record the amount of water, and use those notes for future batches.
Does freeze-dried food need refrigeration?
Properly freeze-dried and packaged shelf-stable food generally doesn't while it's dry and sealed. Once rehydrated, follow the food-safety rules for the original food.
How long does a freeze-dried pantry last?
Under favorable conditions with good packaging, some foods may approach 25 years, but it's not guaranteed. It varies by food, packaging, and storage, so rotate and inspect packages regularly.
Can I use freeze-dried food for everyday cooking?
Yes. Many freeze-dried vegetables, fruits, herbs, and prepared ingredients work in everyday recipes.
Build a Pantry You'll Actually Use
A useful freeze-dried food pantry doesn't have to be enormous. It can start with a few jars of fruit, several bags of vegetables, and ingredients for your favorite meals. Preserve foods you enjoy, package them properly, organize them clearly, and use them regularly.
Partager:
Freeze Drying vs. Canning: Which Is Better?
What Are the Best Foods to Freeze Dry for Beginners?